Keycloak on Kubernetes Setup: A Production-Ready Guide
A common first failure when moving an identity server onto Kubernetes: the login page renders, but every redirect points at an internal hostname. A production Keycloak setup on Kubernetes avoids that and similar traps with the Keycloak Operator or a well-maintained Helm chart, an external PostgreSQL database, TLS at the ingress, two or more clustered replicas, and realm configuration kept in code. This guide walks through those five steps and a routine to keep them healthy. Option names change between Keycloak releases, so check every setting against the documentation for the version you pin.
The short answer: what a production Keycloak setup on Kubernetes needs
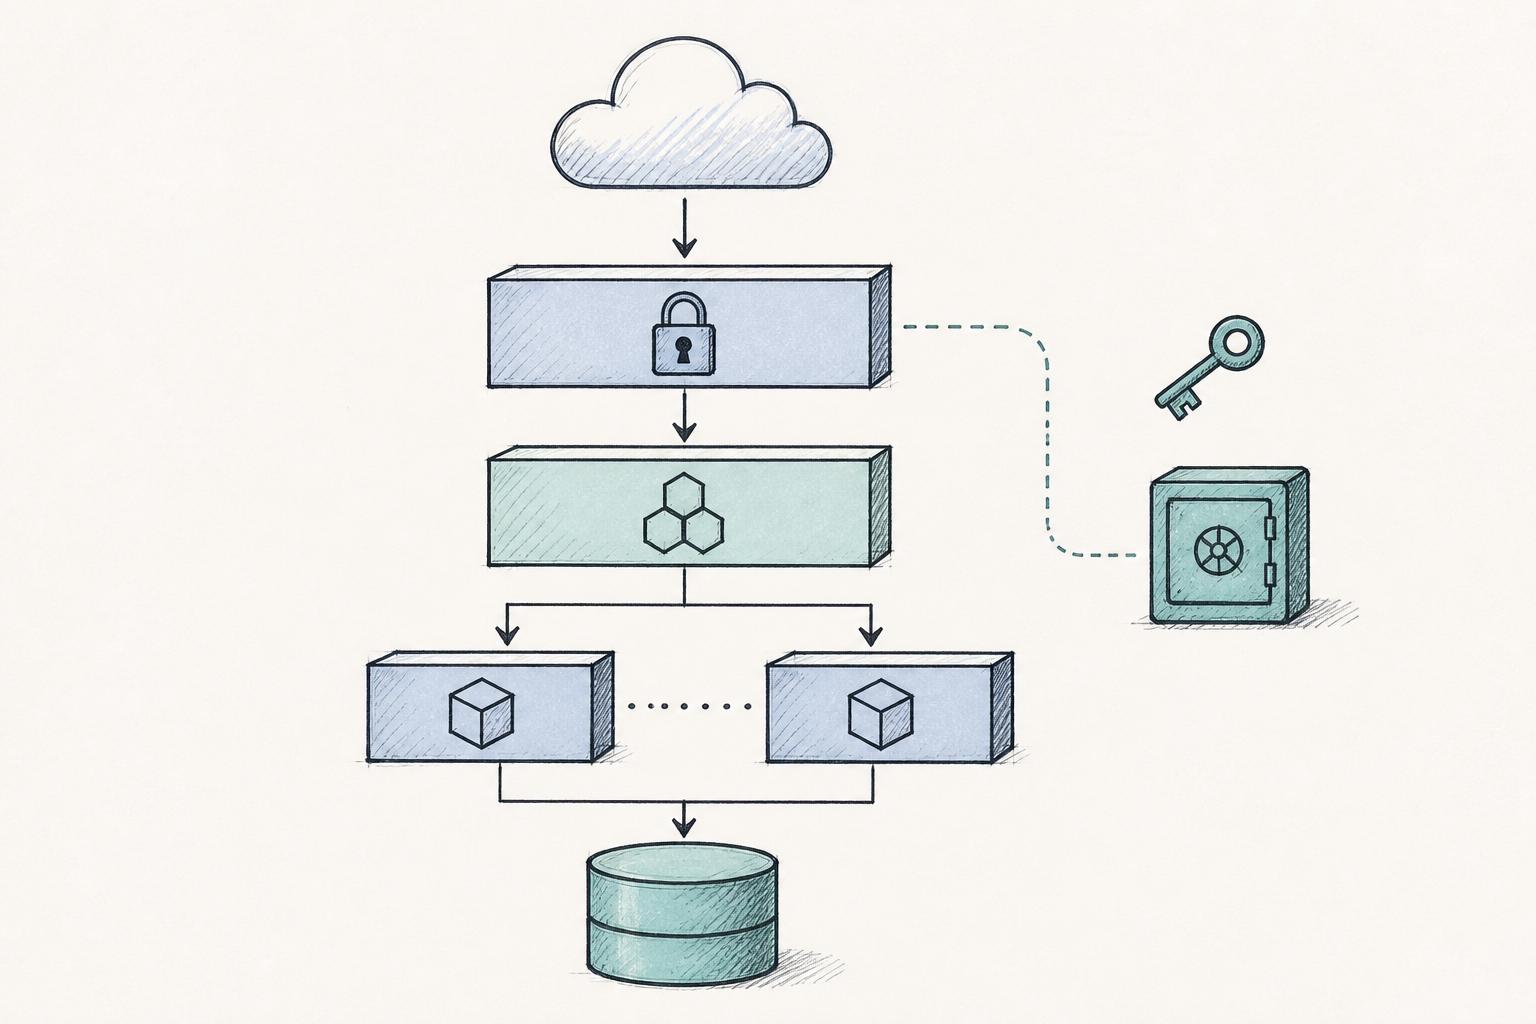
A production setup has five parts:
- Install method: the Keycloak Operator or a maintained Helm chart, with a pinned image tag.
- Database: an external PostgreSQL with tested backups, never the embedded dev database.
- TLS: certificates terminated at the ingress and issued automatically.
- Availability: at least two replicas that form a cluster and share cache state.
- Configuration as code: realms, clients and roles defined in Terraform, not clicked together in the console.
Comparing the three install paths
Raw YAML | Helm chart | Operator | |
|---|---|---|---|
Good for | Learning, small fixed setups | Teams already standardized on Helm | Teams that want Keycloak-specific lifecycle handling |
Strengths | Full visibility, no extra tooling | One values file per environment, release history and rollbacks come with Helm | A single |
Weaknesses | You own every manifest and every upgrade diff | Quality depends on the chart's maintainer and release pace | Extra component to install; CRD fields can change between versions |
Maintenance burden | High and growing | Low to moderate | Low |
Raw YAML is a legitimate starting point, and I would use it to learn what Keycloak needs before hiding it behind a chart or an operator.
It becomes a burden once you add clustering, probes, a management port, a custom image and several environments. At that point every Keycloak upgrade means diffing hand-written manifests against changed defaults. Helm removes part of that work by putting configuration in a values file. If you choose a community chart, check that it is actively maintained and tracks the Keycloak version you need.
My preference is the Operator, because one custom resource replaces most of the hand-written manifests, so the examples below use it and note where Helm differs. The trade-off is that its CRD fields can move between versions, so I re-read the upgrade notes each time.
One-glance architecture
Internet
   |
Ingress (TLS via cert-manager)  -- public: /realms/*, /resources/*
   |                              restricted: /admin/*, /realms/master/*
Service: keycloak-service (HTTP 8080)
   |
Keycloak pods x2-3  <--- headless Service (keycloak-discovery) for JGroups DNS_PING
   |
PostgreSQL (managed, or operator-run with backups)

Secrets: DB credentials, bootstrap admin, TLS
Management port (health, metrics): cluster-internal only
Prerequisites
- A Kubernetes cluster recent enough for your ingress controller and cert-manager releases, with persistent volume support if you run Postgres in the cluster.
- An ingress controller such as Nginx Ingress, with ports 80 and 443 reachable from the internet (HTTP-01 certificate issuance needs port 80).
- cert-manager with a working
ClusterIssuer. - A managed PostgreSQL, or storage-backed Postgres with backups.
- A DNS hostname you control, for example
sso.example.com.
Step 1: Deploy PostgreSQL and manage secrets properly
Keycloak's dev mode is meant for development, not production. It uses an embedded H2 database that lives inside the pod. That database cannot be shared between replicas and is lost if the pod is rescheduled, so it must never reach production.
Managed or in-cluster PostgreSQL
- Managed Postgres (RDS, Cloud SQL and similar) moves backups, patching and failover to the provider. It is the lowest-effort choice if you are already on a cloud.
- An in-cluster Postgres operator such as CloudNativePG or the Zalando postgres-operator suits on-premises or cost-sensitive setups. You own storage classes, backup targets and upgrades.
- A hand-rolled StatefulSet is workable for staging. For production, it leaves you rebuilding what the operators already provide.
Create the database, user and Secret
CREATE USER keycloak WITH PASSWORD '<generated>';
CREATE DATABASE keycloak OWNER keycloak;
I make the user the database owner so it can always create tables in its own schema. Granting only database-level privileges can leave a user unable to create tables, which shows up as a startup error in Keycloak. Check your PostgreSQL version's default schema permissions if you prefer a narrower grant.
kubectl create namespace identity
kubectl -n identity create secret generic keycloak-db \
  --from-literal=username=keycloak \
  --from-literal=password='<generated>'
Keep credentials out of Git. Use an external secrets tool (External Secrets Operator, Sealed Secrets or SOPS) so that only encrypted or referenced values are committed. Apply the same rule to the bootstrap admin account: create it from a Secret, log in once, create a named permanent admin, and remove or rotate the bootstrap credentials.
Backups and restore tests
The database holds every user, credential hash, client and realm setting. A backup you have never restored is only a hope. Schedule logical or snapshot backups, store them outside the cluster, and restore into a scratch database at least quarterly. Confirm that Keycloak starts against the restored copy.
Check connectivity before installing Keycloak
kubectl -n identity run pg-check --rm -it --restart=Never --image=postgres:16 \
  --env="PGPASSWORD=$(kubectl -n identity get secret keycloak-db -o jsonpath='{.data.password}' | base64 -d)" \
  -- psql -h <db-host> -U keycloak -d keycloak -c 'select 1;'
If this fails, fix DNS, network policies or credentials now. Debugging them through Keycloak's startup logs is slower.
Step 2: Install Keycloak (Operator or Helm) with the right hostname and proxy settings
Install the Operator's CRDs and deployment as described in the Keycloak documentation for your version, then create the instance. The field names below reflect recent Operator versions and are a starting point, not something I have tested against every release.
apiVersion: k8s.keycloak.org/v2alpha1
kind: Keycloak
metadata:
  name: keycloak
  namespace: identity
spec:
  instances: 2
  image: registry.example.com/idp/keycloak:<pinned-version>
  db:
    vendor: postgres
    host: <db-host>
    usernameSecret: { name: keycloak-db, key: username }
    passwordSecret: { name: keycloak-db, key: password }
  hostname:
    hostname: https://sso.example.com
  http:
    httpEnabled: true        # TLS terminates at the ingress
  proxy:
    headers: xforwarded
  ingress:
    enabled: false           # managed separately in Step 3
With a Helm chart, the same settings arrive as environment variables or values: KC_DB, KC_DB_URL, KC_HOSTNAME, KC_PROXY_HEADERS=xforwarded, KC_HTTP_ENABLED=true. Always pin the image to an exact version tag. A floating latest tag turns any pod restart into an unplanned upgrade.
Common failure causes
- Wrong hostname: redirects point to an internal address or the wrong scheme. Check that
hostnamematches the public URL exactly. - Mixed HTTP/HTTPS: without proxy headers, Keycloak can build
http://links behind a TLS ingress, and browsers block them. Setproxy-headersand make sure the ingress sendsX-Forwarded-*headers. - Blank admin console: usually a symptom of the two problems above, with blocked scripts or failed redirects visible in the browser console.
- Reading the logs:
kubectl -n identity logs deploy/keycloak(or the StatefulSet name the Operator creates) shows database errors, hostname validation errors and cache join messages at startup.
Resources, JVM memory and probes
Set requests and limits explicitly. An example starting point, not a benchmark: requests of 1 CPU and 1.5 GiB, and a memory limit of 2 GiB. Tell the JVM to size its heap relative to the container, for instance with JAVA_OPTS_KC_HEAP="-XX:MaxRAMPercentage=65 -XX:InitialRAMPercentage=50", leaving room for off-heap memory. Load test with your own login volume and adjust.
Keycloak exposes health endpoints when enabled (KC_HEALTH_ENABLED=true). Map them to probes:
- startupProbe on
/health/started, with a generous failure threshold because Keycloak starts slowly. - readinessProbe on
/health/ready. - livenessProbe on
/health/live.
Separate the management port
In recent releases, health and metrics are served on a separate management port (9000 by default; confirm for your version). Leave that port out of the Service and Ingress that face users. Probes and your metrics scraper reach it inside the cluster, and the public never sees it.
Step 3: Expose it safely with Ingress and TLS
Create an Ingress with a cert-manager annotation so certificates are issued and renewed automatically:
apiVersion: networking.k8s.io/v1
kind: Ingress
metadata:
  name: keycloak-public
  namespace: identity
  annotations:
    cert-manager.io/cluster-issuer: letsencrypt-prod
spec:
  ingressClassName: nginx
  tls:
    - hosts: [sso.example.com]
      secretName: keycloak-tls
  rules:
    - host: sso.example.com
      http:
        paths:
          - { path: /realms/,    pathType: Prefix, backend: { service: { name: keycloak-service, port: { number: 8080 } } } }
          - { path: /resources/, pathType: Prefix, backend: { service: { name: keycloak-service, port: { number: 8080 } } } }
What to expose and what to restrict
- Public:
/realms/for login, tokens and discovery, and/resources/for static assets. - Restricted:
/admin/and the master realm at/realms/master/. Put these on a second Ingress with an IP allowlist (for Nginx, thewhitelist-source-rangeannotation) or behind a VPN. - Never routed: the management port.
Rate limiting and allowlisting trade-offs
Rate limiting (for example Nginx's limit-rps) slows brute-force attempts on the login endpoints, but a low limit can block legitimate users behind a shared NAT. Tune it by watching real traffic. An allowlist on the admin path is stronger, but your CI runner needs access too, since Terraform in Step 5 calls the admin API. Allow the runner's egress IPs or run the pipeline from inside the network.
Verify with the discovery document
curl -s https://sso.example.com/realms/acme/.well-known/openid-configuration | jq .issuerThe issuer must be exactly https://sso.example.com/realms/acme. If it shows an internal hostname or http://, revisit the hostname and proxy settings from Step 2.
Reaching Keycloak from inside the cluster
Token validation compares the token's iss claim to the issuer the client expects. If an in-cluster app fetches tokens through http://keycloak-service.identity:8080 while browsers use the public URL, the issuers differ and validation fails. The simplest fix is to have apps use the public URL, which requires cluster DNS to resolve it. If you need an internal URL for back-channel calls, check your Keycloak version's hostname options for a backchannel setting, and keep the issuer in tokens set to the public value.
Step 4: Make it highly available and a hardened image
Run two or three replicas. Keycloak keeps sessions and other state in a distributed cache (Infinispan), and the replicas must find each other. One common approach is a headless Service with JGroups' DNS_PING pointed at it:
apiVersion: v1
kind: Service
metadata:
  name: keycloak-discovery
  namespace: identity
spec:
  clusterIP: None
  selector: { app: keycloak }
  ports: [{ name: jgroups, port: 7800 }]
Then set KC_CACHE_STACK=kubernetes and JAVA_OPTS_APPEND="-Djgroups.dns.query=keycloak-discovery.identity". The Operator typically wires this up itself, so verify rather than duplicate it. Cache and discovery options have changed between Keycloak releases, so check the names and defaults in your version's documentation. To test, log in, then run kubectl delete pod on one replica while the session is active. A working cluster keeps you signed in, and the logs show the members rejoining.
Disruption and scaling controls
- PodDisruptionBudget with
minAvailable: 1so node drains never remove all replicas. - Anti-affinity or topology spread constraints to put replicas on different nodes or zones.
- HorizontalPodAutoscaler with a minimum of 2 and a CPU target such as 70% (an example, not a recommendation for every load). Keycloak starts slowly compared with a typical stateless service, so new pods arrive late. Scale on a lower threshold than you would for a fast-starting service, and keep headroom for login spikes.
Build an optimized image
kc.sh build bakes in providers, themes and build-time options so pods skip the build step at startup and configuration is immutable.
FROM quay.io/keycloak/keycloak:<pinned-version> AS builder
ENV KC_DB=postgres KC_HEALTH_ENABLED=true KC_METRICS_ENABLED=true
COPY providers/*.jar /opt/keycloak/providers/
COPY themes/ /opt/keycloak/themes/
RUN /opt/keycloak/bin/kc.sh build

FROM quay.io/keycloak/keycloak:<pinned-version>
COPY --from=builder /opt/keycloak/ /opt/keycloak/
ENTRYPOINT ["/opt/keycloak/bin/kc.sh"]
Run the container with start --optimized.
Harden and scan
securityContext:
  runAsNonRoot: true
  allowPrivilegeEscalation: false
  readOnlyRootFilesystem: true
  capabilities: { drop: ["ALL"] }
A read-only root filesystem needs writable emptyDir mounts for paths such as /tmp, and possibly Keycloak's data directory. Test it in staging before enforcing it. I scan every image with Trivy in CI and fail the build on critical findings:
trivy image --exit-code 1 --severity CRITICAL registry.example.com/idp/keycloak:<pinned-version>Step 5: Manage realms, clients and users as code
Changes made by hand in the console are not recorded anywhere, so staging and production drift apart. Nobody can say who changed a redirect URI or why. Defining realms, clients, roles and mappers in Terraform gives you review, history and repeatability. It is how I manage identity on the platform I run.
A minimal Terraform example
This uses the community Keycloak provider. Check its registry page for the current source address and supported Keycloak versions. The names below are examples, so adapt them to your setup.
terraform {
  required_providers {
    keycloak = { source = "keycloak/keycloak" }
  }
  backend "s3" {}   # remote, encrypted state
}

provider "keycloak" {
  client_id     = "terraform"
  client_secret = var.keycloak_client_secret
  url           = "https://sso.example.com"
}

resource "keycloak_realm" "acme" {
  realm   = "acme"
  enabled = true
}

resource "keycloak_openid_client" "web" {
  realm_id              = keycloak_realm.acme.id
  client_id             = "acme-web"
  access_type           = "CONFIDENTIAL"
  standard_flow_enabled = true
  valid_redirect_uris   = ["https://app.example.com/callback"]
}

resource "keycloak_role" "editor" {
  realm_id = keycloak_realm.acme.id
  name     = "editor"
}
Store state in a remote, encrypted backend with locking. State can contain client secrets, so restrict access to it. Pass the provider's service-account secret from your CI secret store, never from a committed file.
Safe rollout
- Run
terraform planon every pull request and review the diff like application code. - Apply to staging first, run a login test, then apply to production.
- Use realm JSON export only as a one-time baseline when importing an existing realm into code. After that, Terraform is the source of truth.
Zero-downtime upgrades
- Read the release notes for breaking changes, especially database migrations and removed options.
- Start the new image against a copy of the production database and confirm migrations succeed.
- Roll out with a rolling update only if the upgrade guide for your version allows mixed versions in one cluster. If it does not, plan a brief controlled switchover instead.
- Keep a rollback path. Restoring the pre-upgrade database snapshot is the dependable one, because schema migrations can be one-way.
Turn it into a repeatable routine: verify, monitor, upgrade
Post-deploy checklist
- The discovery endpoint returns the public issuer.
- A login flow succeeds with a test client.
- A sample service validates a token from that realm.
- Deleting a pod mid-session does not log the user out.
- A database backup restores into a scratch instance.
Monitoring and alerts
Enable metrics on the management port and scrape them. Alert on:
- login error rate
- database connection pool saturation
- pod restarts
- certificate expiry (cert-manager exposes certificate metrics)
Monthly routine
- Check Keycloak security advisories.
- Rebuild the image on the latest patch release and rescan it.
- Apply Terraform to staging, then production.
- Treat a critical CVE as same-day work: rebuild, scan, roll out.
Skipping the operational work
Everything above is ongoing work: patching, backups, upgrades and alerts. Teams that would rather not run an identity server can use a managed service. RealmDeploy, a side project of mine that offers managed Keycloak on Kubernetes with single sign-on over OAuth2 and OIDC, is listed as coming soon.
What happens to your applications when Keycloak is down?
Clustering and a PodDisruptionBudget reduce the odds of an outage, but they do not remove it. A bad upgrade, a database failover or an expired certificate can still take Keycloak offline. How much your applications suffer depends on how they validate tokens, which is a design choice you can make before the incident.
- Local JWT validation: apps that verify token signatures against cached signing keys keep serving requests with already-issued tokens until those tokens expire. They only need Keycloak again for new logins, refreshes, and key refetches after a key rotation.
- Introspection on every request: apps that call Keycloak's token introspection endpoint per request fail as soon as Keycloak is unreachable.
- Anything that needs a login or refresh: new sign-ins, token refreshes and logouts fail for everyone, whatever the validation method.
Example: if access tokens live for 10 minutes, a user who was signed in when the outage began can keep working for up to 10 minutes in apps that validate locally, then hits a login that cannot complete. A longer lifespan buys more outage tolerance, but it also leaves a revoked session's token usable for longer. There is no universally right value, so choose it deliberately for each client.
My recommendation is local validation on hot paths, with the signing keys cached and refreshed on a sensible schedule. Then rehearse it: in staging, scale Keycloak to zero and watch what each application does. It is far better to find the app that introspects on every call during a drill than during an incident.
How do I move an existing Keycloak onto Kubernetes?
Most teams adopting this setup already have a running Keycloak, so the real question is how to cut over without breaking every client. I would not do it in one step. This is reasoning from how the pieces fit together, not a tested runbook for every version.
- Change one thing at a time. Restore a copy of the existing database into the new PostgreSQL and start the same Keycloak version against it. Upgrade only after that works.
- Keep the public hostname. Tokens carry the issuer URL, so a new hostname invalidates validation in every client. Move DNS to the new ingress instead of changing the address.
- Prefer a database restore over a realm export when you need users and credentials intact. Check what your version's export includes before relying on it, and use export only as the baseline for Terraform.
- Rehearse the cutover in staging. Lower the DNS TTL beforehand, freeze admin changes, take a final database copy, switch DNS, and keep the old instance stopped but intact as a rollback.
The honest limitation is that the simple version of this needs a short maintenance window, because the database copy must be taken while no one is changing data. Expect users to sign in again after the switch rather than assuming sessions carry over.
Should you run Keycloak yourself at all?
Self-hosting is the right call when you need control over data location, custom providers or themes, or a portable identity layer, and when someone on your team can own it. Identity is a tier-zero dependency: when it is down, every application that signs users in is effectively down too.
Self-hosting is the wrong call in these cases:
- Nobody is on call for it. If no one can respond to a failed upgrade or an expired certificate, the Operator will not save you.
- Your needs are basic. If you only need social login for one small app, a hosted identity provider such as Auth0, Amazon Cognito or Okta removes the whole operational surface. The cost is less control and harder migration later.
- You cannot test restores and upgrades. Without a staging environment and a backup you have actually restored, you are taking on risk you cannot measure.
My rule of thumb: self-host Keycloak when you will run it as a product, with an owner, alerts and a monthly routine. Otherwise pay someone else to carry that load. This guide shows what the work involves so you can decide with the full list in front of you.
FAQ
Should I use the Keycloak Operator or a Helm chart?
Use the Operator if you want Keycloak-specific lifecycle handling and fewer hand-written manifests. Use a Helm chart if your team already deploys everything through Helm and the chart is actively maintained. Both can work in production. The deciding factors are your existing tooling and the maintainer's release pace.
How many Keycloak replicas do I need on Kubernetes?
Two is the practical minimum for availability, and three gives more margin during node drains and upgrades. Add replicas based on measured login load rather than guesses. New pods start slowly, so autoscaling should have headroom.
Can I run Keycloak on Kubernetes without the Operator or Helm?
Yes. Plain manifests (a StatefulSet or Deployment, Services, an Ingress and Secrets) work and are a good way to learn what Keycloak needs. The cost is that you own every upgrade diff, so I would move to the Operator or a chart once you have clustering, probes and more than one environment.
Can I use the embedded database in production?
No. The embedded dev database cannot be shared between replicas and does not survive a pod being rescheduled. Use an external PostgreSQL and test restores.
How do I keep the admin console off the public internet?
Route only /realms/ and /resources/ through the public Ingress. Put /admin/ and the master realm on a second Ingress with an IP allowlist, or behind a VPN, and allow your CI runner's egress IPs if Terraform needs the admin API.